Tuesday, December 16, 2014
Unexpectedly Out Today
My daughter got sick in the car on the way to the sitter this morning, so I had to turn around and drive home. I have "emergency" sub plans but the last I checked, a sub couldn't be found to cover me today. I'm not sure if he music teacher is doubling up her classes, but I wanted everyone to know when your child comes home today saying they didn't have art. I will be back tomorrow.
Monday, December 15, 2014
Painted Snowflakes
Kindergarten artists are painting a snowflake on their "extra art day" (Monday rotation day). I read the book, Snow, by Cynthia Rylant and we discussed how no two snowflakes are the same. I pulled up many different snowflakes on the smartboard for inspiration and we talked about the lines we saw on the snowflakes: straight up-and-down, straight side-to-side and straight diagonal.
Children chose the 9x9" color of paper they wanted and used white paint to make their snowflake making sure some of the lines touched the edge of the paper. After the snowflake was on the drying rack, I sprinkled iridescent glitter over the top.
(more pictures will be added tomorrow after the paintings are dry)


Monday, December 8, 2014
Miss Zimmerman's last day...
Miss Zimmerman's last day will be this Thursday, December 11th. She is graduating from Miami University on Friday, December 12! She has been a HUGE asset to the art program here at MECC and will miss her dearly. The district who hires her will be very lucky to have her.
She is going to get on the sub list for Mason, so hopefully we will see her around the building soon! :-)
She is going to get on the sub list for Mason, so hopefully we will see her around the building soon! :-)
Pinch Pots Continued...
Pinch pots were painted last week with underglaze. Underglaze is a paint that goes on the clay either before the clay is fired or sometimes after the clay is fired. The underglaze is non-toxic and food safe. Kindergartners are painting a color pattern on the outside of the bowl and a single color on the inside. They could choose from: red, black, yellow, blue or green.
I am still firing pinch pots. the kiln gets to almost 1900 degrees and takes around 6 hours to fire. After the pinch pots are fired and cooled, I will have the children paint a top clear glaze over their pinch pot (which will be this week). This will make the pot shiny and safe to eat and drink from. After the clear glaze is on, I have to fire the pots again. Pinch pots will come home late January.


 Glazed pinch pots.
 Finished pinch pots (only some of 2 classes done)
I am still firing pinch pots. the kiln gets to almost 1900 degrees and takes around 6 hours to fire. After the pinch pots are fired and cooled, I will have the children paint a top clear glaze over their pinch pot (which will be this week). This will make the pot shiny and safe to eat and drink from. After the clear glaze is on, I have to fire the pots again. Pinch pots will come home late January.

 Glazed pinch pots.
 Finished pinch pots (only some of 2 classes done)
Firing all of the pinch pots a 2nd time will take me a couple of weeks after we return from winter break. I have to make sure the glaze isn't covering the bottom of the pinch pots; if it does, I have to wipe it off so the pinch pot doesn't stick to the shelf in the kiln and get stuck.
Wednesday, December 3, 2014
Texture Pendants
Kindergarten artists are creating texture pendants this week. We are reviewing what texture (how something feels) is and how the clay they are getting this week is different from the clay they made their pinch pot from (last week they received brown clay like Native Americans and this week they are getting white). The children will feel the bottom of their shoe and look at the design. The design from the bottom of their shoe will be the design on the pendant.
The texture pendant will be a wearable piece of art when done. I am showing pictures of Olympic medals and pendant necklaces that women wear. We are discussing how the pendant is round and hangs down off of a ribbon or chain. I am also showing pendants from our Native American book so the children can see that people make jewelry.
The steps to make a pendant:
1. Roll the clay until it is a nice smooth ball.
2. Place the ball on the fabric mat.
3. Step on it 1 time.
4. Pick it up off of the mat, turn it over to the back and write initials.
5. Let it dry (I am making the hole towards the top so the children can string the pendant when fired and dry).
The pendants should be dry within a couple of days. As soon as they are, I plan to fire them in the kiln and my hope is that the children will be able to paint them next week!
 Rolling the clay into a ball.
 Setting the ball of clay down on the fabric mat
 Stepping on the ball of clay.
  Pendants!


Tuesday, December 2, 2014
Art to Remember coming home....
Art to Remember orders are in!!! They arrived a week earlier than expected. The boxes are being delivered today to the classroom teachers and they are going to pass out the orders to the children tomorrow. Your child should be bringing home their order tomorrow, so please check their backpack!
The legacy tiles have not shipped yet. They are expected to ship in January. After I receive the tiles, I will install them and let you know where they are hanging up.
Thank you again for all of your support of the arts and making Art to Remember a HUGE success this year!!!!!
The legacy tiles have not shipped yet. They are expected to ship in January. After I receive the tiles, I will install them and let you know where they are hanging up.
Thank you again for all of your support of the arts and making Art to Remember a HUGE success this year!!!!!
Monday, December 1, 2014
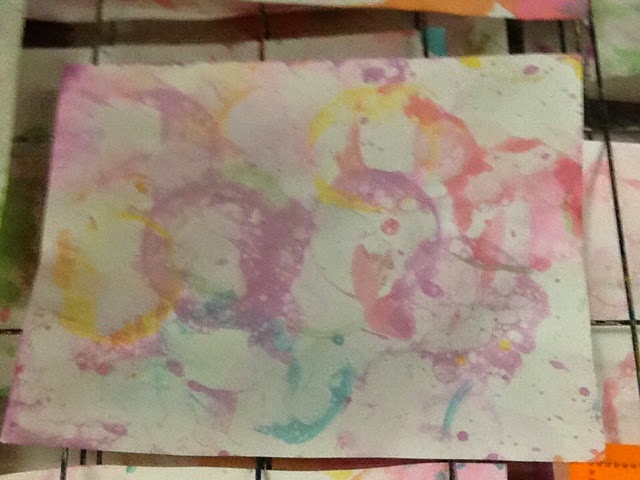
Bubble prints
Kindergartners are making bubble prints on Monday "extra art day". We are discussing the order of colors in a rainbow and how to make a print. They are turning out great and the kids are having a blast!


Thursday, November 20, 2014
Pinch Pots!!!!
Kindergarten artists are learning about clay and texture and then creating a pinch pot. We will discuss how clay comes from the ground, can be different colors (gray, white, brown, reddish-orange) and has a texture. Texture is the way something feels: bumpy, smooth, soft, hard, squishy, rough, etc.
On the learning carpet, we are having the children feel their hair, clothes and shoes and describe the texture to us. We are showing pictures of Native American pottery to give the children inspiration for making their pinch pot. To create a pinch pot, the children follow the steps:
1. Roll it (into a nice smooth ball of clay)
2. Thumb it (stick thumb in middle but not all the way through)
3. Pinch it (keeping the thumb in the hole and rest of the fingers on the outside, children are pinching the clay to make the hole bigger and create the pot's walls)
4. Check it (have Ms. Zimmerman or myself make sure the pinch pot walls are not too thin or thick)
5. Smooth it (rubbing away all the little cracks)
Clay takes around 7-12 days to dry. After Thanksgiving break, the children will use underglaze to paint a color pattern on their pinch pot. After that, I will fire their pinch pot in the kiln. The children will be painting a clear glaze over the top to make their pots safe for eating and drinking from. Most of them will not be big enough to drink from, but I like to have that option for the children.
 2 artists sticking their thumb in their clay before pinching it open to make their pot.
 An awesome artist working super hard on his pinch pot
 Awesome artists pinching their clay
 Just some of the Pinch Pots from Wednesday!
 The kiln that I fire the pinch pots in.


On the learning carpet, we are having the children feel their hair, clothes and shoes and describe the texture to us. We are showing pictures of Native American pottery to give the children inspiration for making their pinch pot. To create a pinch pot, the children follow the steps:
1. Roll it (into a nice smooth ball of clay)
2. Thumb it (stick thumb in middle but not all the way through)
3. Pinch it (keeping the thumb in the hole and rest of the fingers on the outside, children are pinching the clay to make the hole bigger and create the pot's walls)
4. Check it (have Ms. Zimmerman or myself make sure the pinch pot walls are not too thin or thick)
5. Smooth it (rubbing away all the little cracks)
Clay takes around 7-12 days to dry. After Thanksgiving break, the children will use underglaze to paint a color pattern on their pinch pot. After that, I will fire their pinch pot in the kiln. The children will be painting a clear glaze over the top to make their pots safe for eating and drinking from. Most of them will not be big enough to drink from, but I like to have that option for the children.
 2 artists sticking their thumb in their clay before pinching it open to make their pot.
  An awesome artist working super hard on his pinch pot
 Awesome artists pinching their clay
 Just some of the Pinch Pots from Wednesday!
 The kiln that I fire the pinch pots in.
Wednesday, November 19, 2014
Tuesday Art Classes
I came into school today to find out my sub didn't follow my 2-step directions...even with my examples I have provided....UGH! I'm not really sure how my sub didn't understand or maybe she understood and didn't like the plans I gave. Anyways, that was a waste of a day for the children. I feel badly that the children didn't have a productive/useful art day.
I've made sure to not allow to have that sub back for me!!
I've made sure to not allow to have that sub back for me!!
Monday, November 17, 2014
Out SICK Tuesday, November 18
I will be out sick tomorrow, Tuesday, November 18th. I'm waiting to get into the doctor now, but I have a low fever as of now and drainage. YUCK! Thankfully, Miss Zimmerman (student teacher) is teaching today. Unfortunately, she will be up at Miami University tomorrow, so the children will only have a guest teacher.
They will, however, be creating "A Crazy Hair Day" piece of art.
They will, however, be creating "A Crazy Hair Day" piece of art.
Thursday, November 13, 2014
Chihuly Macchia
2nd grade artists learned about famous artist, Dale Chihuly this week. Chihuly, is an American glass sculptor born in 1941.
http://www.chihuly.com/
I showed a quick video on YouTube of Chihuly's work. You can take a look here:
Through The Looking Glass.
Children received a small piece of overhead transparency, traced a circle onto it, drew a curvy line around the circle and cut it out, making sure to cut right on the curvy line.
Then, the children used enamel paint in various colors to add color to the transparency. After the paint is dry, Miss Zimmerman and I will put the transparency on top of an upside down glass cup and use a heat gun to make the transparency change from a 2-D piece of art to a 3D piece of art.

 The colors are a bit off in the picture. Children had magenta, white, yellow, green, blue and dark purple paint. The dots are in black.


http://www.chihuly.com/
I showed a quick video on YouTube of Chihuly's work. You can take a look here:
Through The Looking Glass.
Children received a small piece of overhead transparency, traced a circle onto it, drew a curvy line around the circle and cut it out, making sure to cut right on the curvy line.
Then, the children used enamel paint in various colors to add color to the transparency. After the paint is dry, Miss Zimmerman and I will put the transparency on top of an upside down glass cup and use a heat gun to make the transparency change from a 2-D piece of art to a 3D piece of art.
The colors are a bit off in the picture. Children had magenta, white, yellow, green, blue and dark purple paint. The dots are in black. Tuesday, November 11, 2014
Kindergarten Teepee Continued
Kindergarten artists are creating the background (the space behind the main object in a picture) for their teepee. To make the background, the children are drawing a horizon line (where the sky and the ground meet). The horizon line will be mountains and artists can choose to draw a zig zag, curvy or bumpy line for it. After drawing their horizon line, children are using liquid watercolors to paint their sky blue, the mountains green and the ground brown. Then, they use a paper towel to blot any paint that is too wet before gluing their teepee on the top.
To glue the teepee, children are remembering to use "Just a dot, not a lot" of glue (4 dots:1 in each corner and 1 in the middle). After gluing the teepee, children will add sticks to the top that are precut pieces of construction paper.


To glue the teepee, children are remembering to use "Just a dot, not a lot" of glue (4 dots:1 in each corner and 1 in the middle). After gluing the teepee, children will add sticks to the top that are precut pieces of construction paper.
Friday, November 7, 2014
Kindergarten art coming home next week!
Kindergartners will be bringing home their masterpieces next week! I know you and your child have been patiently waiting; thank you!
To help encourage critical thinking and develop your child’s critical thinking skills ask your child open ended questions about their artwork. Open ended questions will help support your child’s efforts rather than if you said “good job” or “that is beautiful”.
1. What can you tell me about your picture?
2. What materials did you use?
3. What is your favorite part of the picture?
4. What title would you give this picture?
5. If you were doing this picture again what you change or do differently?
6. If you had more time what would you add to your artwork?
Encourage your child to elaborate on their answers or use the artwork as a starting point for telling a story. Open ended questions will help develop critical thinking skills in your child. By taking an interest in their work you are supporting them and helping them express their own ideas.
Wednesday, November 5, 2014
Native American Teepee
Kindergarten artists are learning about Native American people and teepees (the home of Native Americans). We are talking about how the Native Americans lived, what shape teepees were and what they were made from and introduced AB patterns (i.e. red, blue, red, blue/ circle, triangle, circle, triangle).
Kindergartners are using construction paper and markers for their teepee. Next week, the artists will paint a background on a large 12x18 paper and glue their teepee on top.

We created a classroom teepee out of canvas and dowel rods. The "fire" from battery operated candles.


Kindergartners are using construction paper and markers for their teepee. Next week, the artists will paint a background on a large 12x18 paper and glue their teepee on top.
We created a classroom teepee out of canvas and dowel rods. The "fire" from battery operated candles.

Artists working on their patterns

Monday, November 3, 2014
Art to Remember deadline extended!
Friday, November 7th, will be the last day to order Art to Remember! Please let me know if you have any questions!!
Friday, October 31, 2014
Warm Leaves
On Monday rotation (extra art day), Kindergarten artists are choosing a color diffused leaf and using warm colored markers (red, orange and yellow) to color their leaf. They used brown (a neutral color) for drawing the veins of the leaf. After the leaf was colored in, they painted water on top which blended the colors together. I think they look beautiful hanging up in the windows!
 These leaves are hanging in the windows leading up to the library from the kindergarten wing
 These leaves are hanging in the windows leading up to the library from the kindergarten wing
Tuesday, October 28, 2014
Cave Art with Kindergarten
Kindergarten artists learned about cave art, how cavemen lived, symbols that were used, and looked at a famous cave, Lascaux, in France.
When children arrived to art, Miss Zimmerman (my student teacher) told the children the art room had transformed into a cave and to get to the learning carpet, they had to crawl through a cave. We kept the lights off during art with only a couple of lamps on to give the feel of a real cave being dark. On the learning carpet, the children watched a virtual tour of Lascaux cave and we discussed the paintings and colors noticed on the cave walls. We continued to discuss how cavemen lived and some of the things used to make the paintings.
Kindergartners received a brown piece of construction paper. They used brown and black oil pastels to draw an animal (cow, rhino or horse with provided steps) and nature symbol (water, sun, rain, moon). After drawing, kindergartners used yellow and white chalk to color around their drawings since those were the colors they noticed in the virtual tour of Lascaux. They finished their cave art by making a handprint as their signature.

 Kindergarten cave the children crawled through to get to the learning carpet
 paintings inside the cave
 kindergarten artist crawling through the cave
 Kindergarten cave painting
Monday, October 27, 2014
Kindergarten Open House
Specials teachers will not be at open house tomorrow night (October 28). I plan to start sending home your child's masterpieces before Thanksgiving break. Thank you for your patience and support!
Art To Remember order forms coming home MONDAY!!!
Art to Remember order forms will be coming home in your child's backpack on Monday! Ordering is different than in years past-it is ALL ONLINE. No cash or check payments will be accepted at school! Credit card is accepted online. We hope ordering this year will be easier for you and your child; money won't be forgotten and order forms won't be lost.
Your child's order form is personalized for your child; it shows your child's art on various items you can purchase along with the art being on the front. You will have until Nov. 3rd to complete your order.
Art to Remember artwork was created the 3rd week of school, so if your child started school late or if you were out of the country, I'm sorry, but you won't have an order form. It's too difficult to keep track of who was gone and who started when. You will have another chance for Art to Remember in 1st grade. I hope you understand.
Wednesday, October 22, 2014
Henri Rousseau Jungles
2nd grade artists have been learning about texture (the way something feels; bumpy, smooth, soft, hard, etc.) and implied texture (the way something LOOKS like it feels) to create an Henri Rousseau inspired jungle.
Rousseau was a French painter (1844-1910) who was a toll collector and self-taught artist. His best known paintings are of jungles, even though he never visited one himself. His inspiration came from books, botanical gardens and taxidermy animals.
In one art class, artists first created a horizon line (where the sky and the ground meet) with green paper by cutting a curvy, zigzag or bumpy line. Second, children used 2 different painted papers they made the week before to create grass. One way they made grass was by snipping the paper down the length of it. Another way was making skinny, sharp zig zag lines. Third, the sun was created by "scribbling" with warm colored construction paper crayons on orange paper then drawing a circle and cutting it out.
In another art class, children received brown paper to make two trees. After cutting out the tree trunks and branches, artists had to draw an implied texture with brown marker before gluing their tree together.
Next art, the children will add leaves to their trees along with adding a tiger to their picture.
 Jungle with Lion


Rousseau was a French painter (1844-1910) who was a toll collector and self-taught artist. His best known paintings are of jungles, even though he never visited one himself. His inspiration came from books, botanical gardens and taxidermy animals.
In one art class, artists first created a horizon line (where the sky and the ground meet) with green paper by cutting a curvy, zigzag or bumpy line. Second, children used 2 different painted papers they made the week before to create grass. One way they made grass was by snipping the paper down the length of it. Another way was making skinny, sharp zig zag lines. Third, the sun was created by "scribbling" with warm colored construction paper crayons on orange paper then drawing a circle and cutting it out.
In another art class, children received brown paper to make two trees. After cutting out the tree trunks and branches, artists had to draw an implied texture with brown marker before gluing their tree together.
Next art, the children will add leaves to their trees along with adding a tiger to their picture.
Jungle with Lion
Miss Zimmerman Teaching the Demonstration
Miss Zimmerman observed and interacted with the children so well that I had her teach a couple classes the demonstration for the art project on Monday and the carpet motivation learning on Wednesday. I am so excited that Miss Zimmerman is with us; she is fantastic!

 Teaching the warm and cool colors.

Demonstrating how to make circles around each other.
 Teaching the warm and cool colors.
Monday, October 20, 2014
SCSF/Adaptive Fall Art
My SCSF classes are creating Fall themed art and created bubble wrap printed corn husks and fall trees by stamping corks into paint for the leaves.


Friday, October 17, 2014
Kandinsky Circles
Kindergarten artists learned about another painting by Kandinsky on their Monday rotation (extra art day); Squares with Concentric Circles. While looking at the painting on the Smartboard, Kindergarten artists identified how Kandinsky used circles, lots of colors and squares to create his painting. Kindergarten artists received a 6"x6" paper, drew 4 or 5 circles using oil pastels, then painted with watercolors. Children had to work hard to pay attention to their paintbrush so it didn't get a "bad hair day" and to make sure they gave their paintbrush a "bath" before switching to a new color.

Squares with Concentric Circles, 1913


Subscribe to:
Posts (Atom)